This post is a beginner’s guide and a tutorial to transfer WordPress blog from one web host to another web host using cPanel. Before you proceed you need to make sure that both your old hosting account and the new hosting account has cPanel access. Transferring WordPress blog using cPanel is one of the simplest methods to move your WordPress blog from one hosting account to another and it involves three steps: Download Home Directory Backup and MySQL Database from old cPanel, Restore Home Directory Backup and MySQL Database to new cPanel and Create the database user.
Here are the steps to transfer WordPress blog to another web host using cPanel:
Step-1: Download Home Directory Backup and MySQL Database from old cPanel.
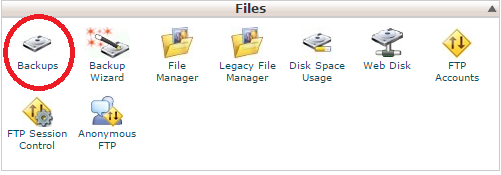
1) Login to the cPanel of your old hosting account and then click on Backups under Files.
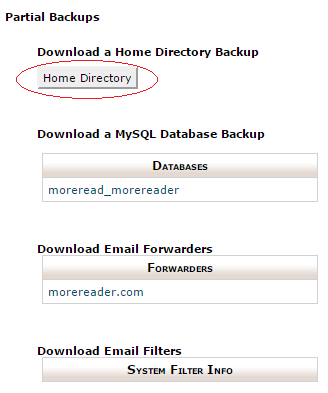
2) Under Partial Backups, click on “Home Directory” under Download a Home Directory Backup and download the home directory backup.
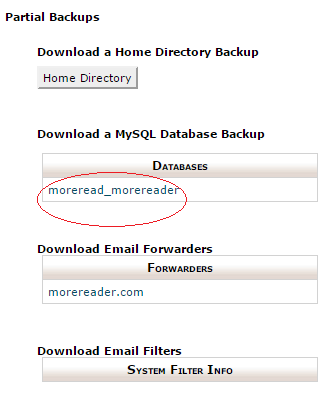
3) Under Partial Backups, click on the database under Download a MySQL Database Backup and download the database. Similarly, download email forwarders and email filters (if any).
Step-2: Restore Home Directory Backup and MySQL Database to new cPanel.
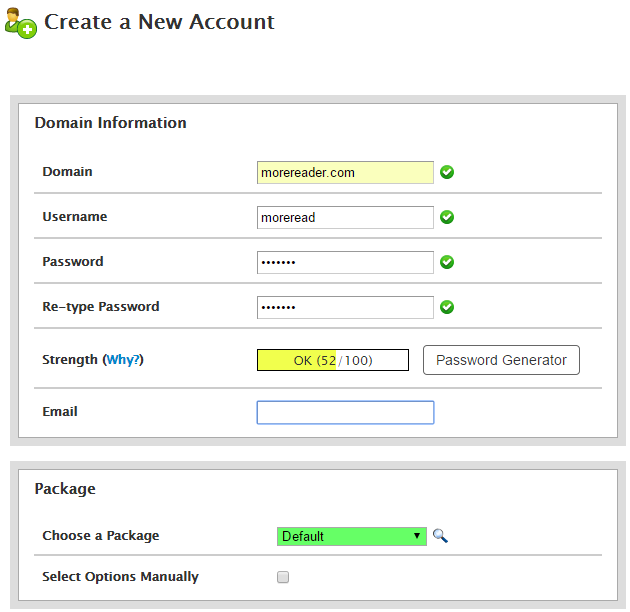
1) Make sure you create a new cPanel account in your new web hosting account with the same username as the old cPanel username. This will make sure that the scripts and plugins which depend on the path of home directory will continue to work as usual.
2) Login to the cPanel of your new hosting account and then click on Backups under Files.

3) Under Partial Backups, click on “Choose File” under Restore a Home Directory Backup.
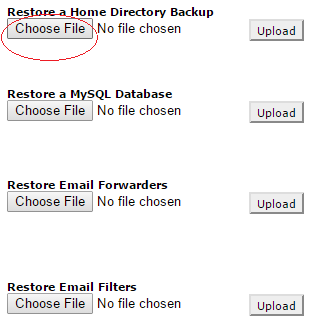
4) Select the Home Directory Backup file which you have downloaded earlier from your old cPanel and click on Upload.
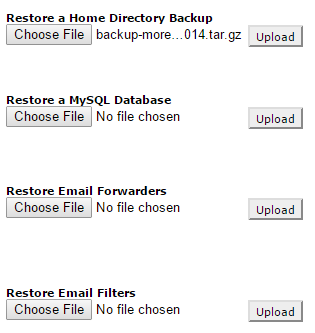
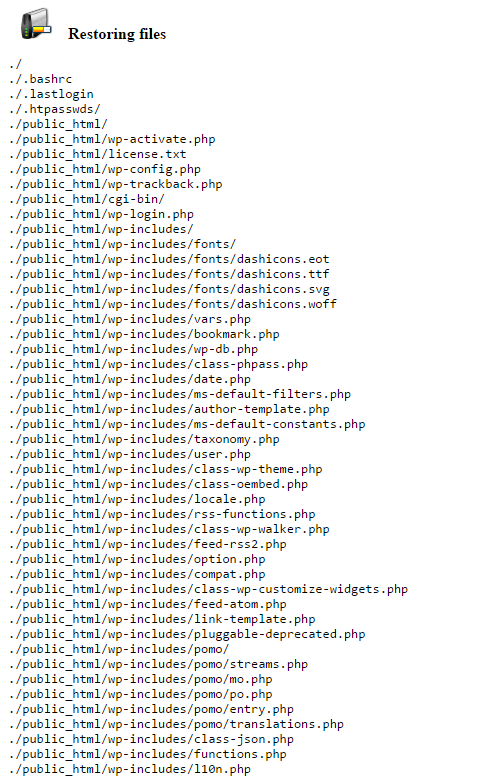
5) It will take some time to upload the Home Directory Backup to your new cPanel. Once the upload is complete you will see Restoring files message.
Note: For larger backups, the above process may not work effectively. To upload the Home Directory Backup to your cPanel, use this method instead:
i) Login to your cPanel
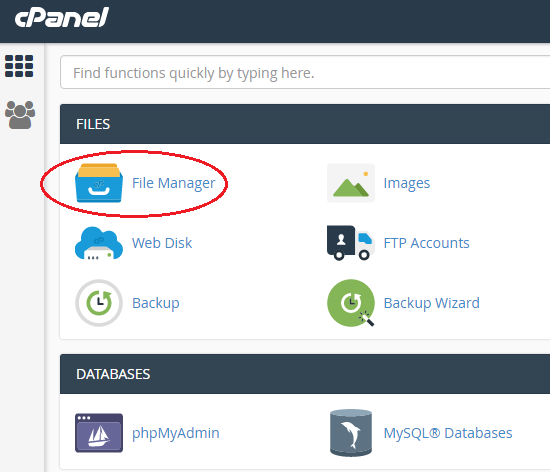
ii) Click on File Manager under Files in cPanel
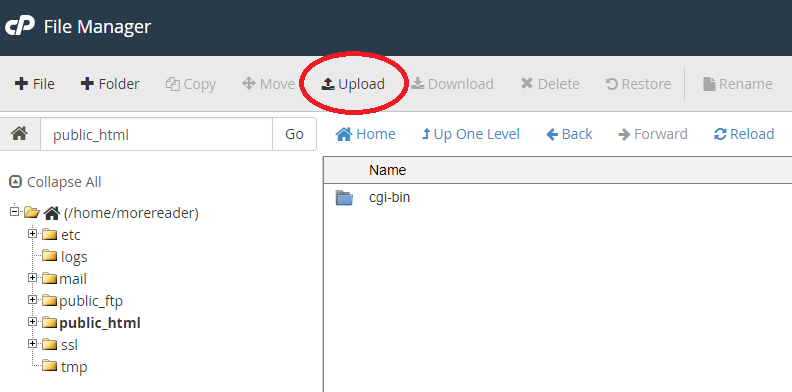
ii) Click on Upload button at the top in File Manager
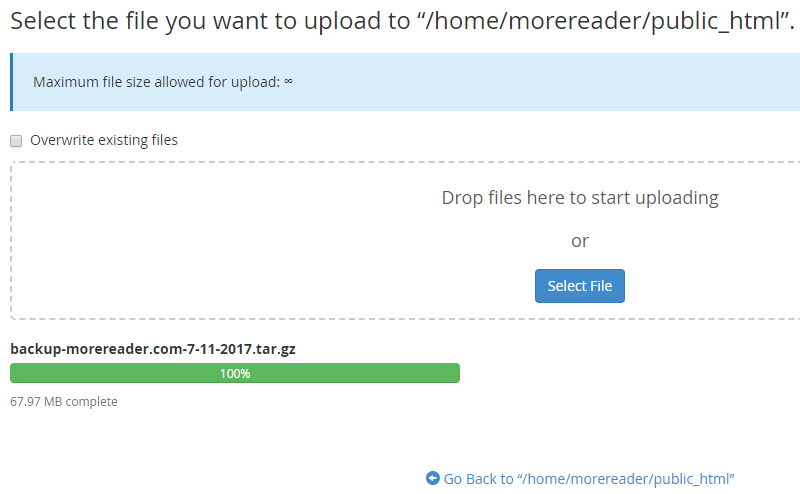
iii) Upload the home directory backup in your Cpanel
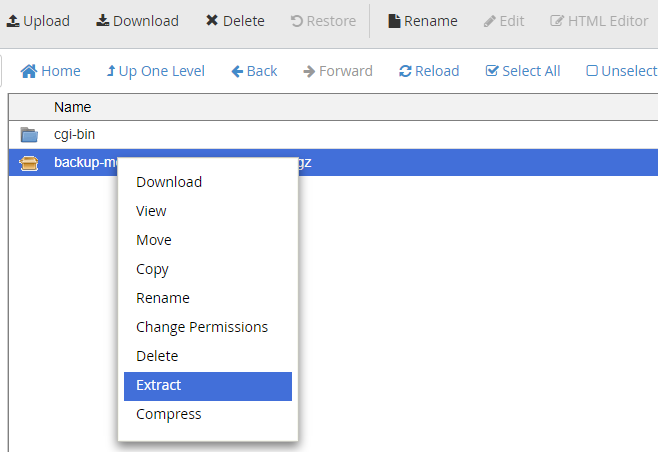
iv) When the home directory backup is fully uploaded, right click on it and then click on Extract.
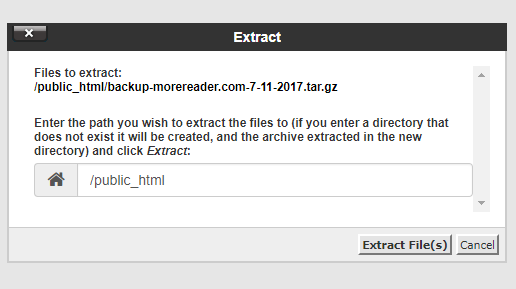
v) Select the location as /public_html and then click on Extract files.
vi) When the files are extracted, click on Select All on the top.
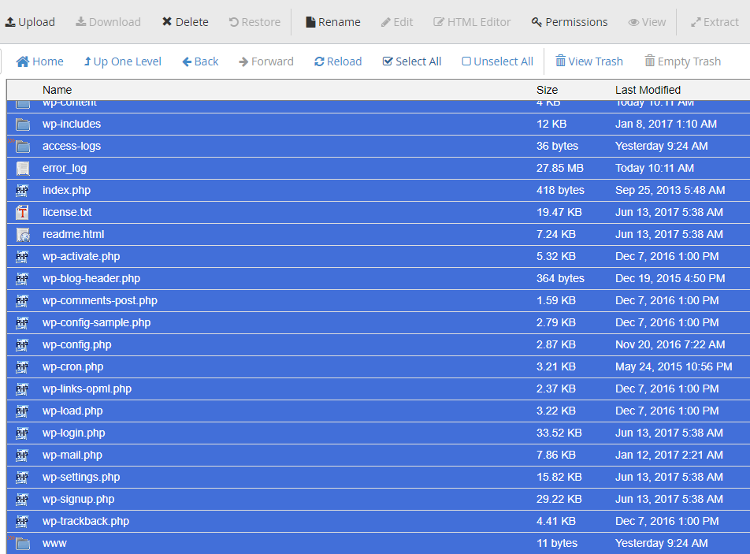
vii) Click on Move on top and then make sure the destination is /public_html and then click on Move Files.
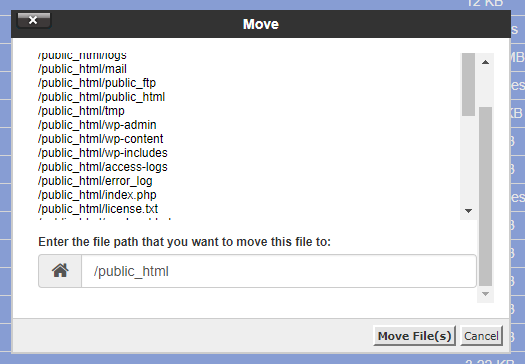
You need to make sure that your website files are under /public_html folder.
That’s all. You have successfully upload the home directory backup to your new cPanel account.
Note: Make sure that the file permissions on your /public_html folder is 0750. Otherwise, you will get a 403 Forbidden Error message.
6) Under Partial Backups, click on “Choose File” under Restore a MySQL Database.
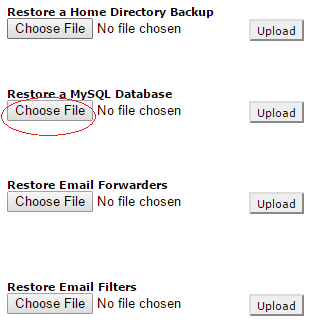
7) Select the MySQL Database file which you have downloaded earlier from your old cPanel and click on Upload.
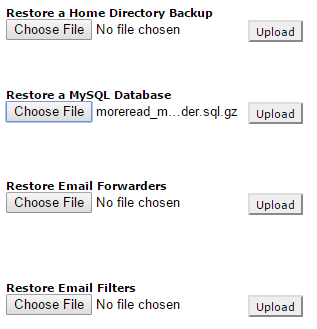
8) Database will be uploaded quickly and you will see Restoring Database message.
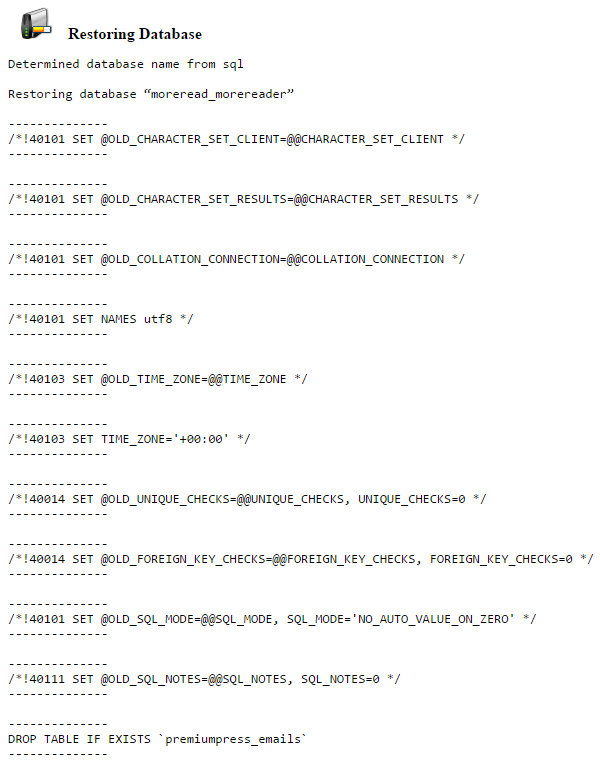
9) Similarly, you can restore Email Forwarders and Email Filters.
Step-3: Create the database user.
1) You need to create the same database user as it was in the previous database. Open the Home Directory Backup and go to: .\public_html –> wp-config.php
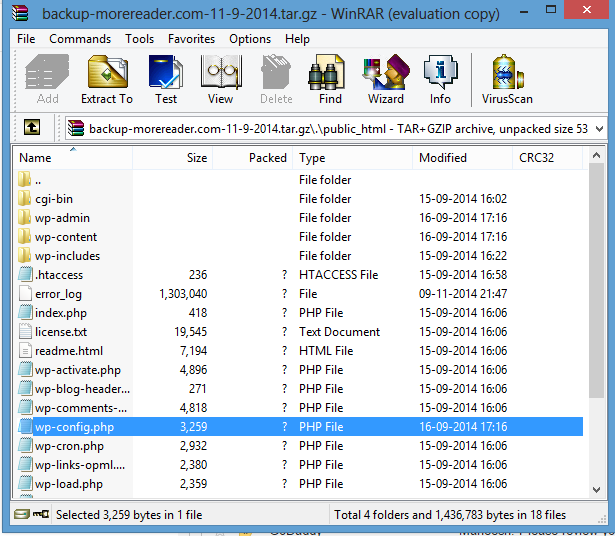
2) Extract wp-config.php file, and find the database username and database password. You can find database username and database password by locating the below given lines in the file:
/** MySQL database username */define(‘DB_USER’, ‘moreread_xyz’);
/** MySQL database password */define(‘DB_PASSWORD’, ‘gs2jh2#s$h@sjs’);
Here, in the database username is: moreread_xyz and database password is: gs2jh2#s$h@sjs
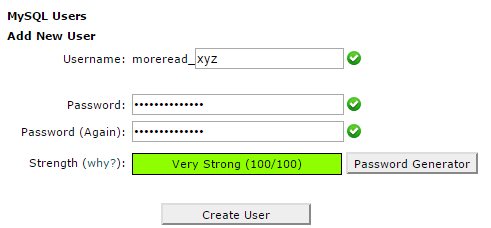
3) Now, in the new cPanel, click on MySQL Databases under Databases.

4) Under MySQL Users, Add New User, enter the database username and password (twice) which you found from wp-config.php file. Click on Create User.
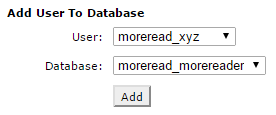
5) Under Add User To Database, select the database user you just created and the Database you restored earlier. Click on Add.
6) Under Manage User Privileges, check option ALL PRIVILEGES and click on Make Changes.
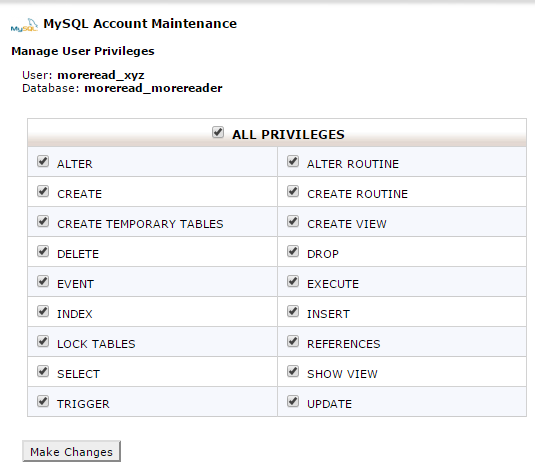
You will get the message: You have successfully granted privileges on the database “moreread_morereader” to the MySQL user “moreread_xyz”.
7) Under Current Databases, you can see the database user connected to the database.

Thats it. You have successfully transferred your WordPress blog from one web host to another web host using cPanel. Now, you can go ahead and change the name servers for the new web host. After the DNS propagation (typically a few hours) your WordPress blog will be on the new web host.
Note: After the transfer of the site, check everything on your new site if its working fine. If you are getting 404 page not found error for individual posts in your blog, go to Settings –> Permalinks and then click on Save Changes Button.
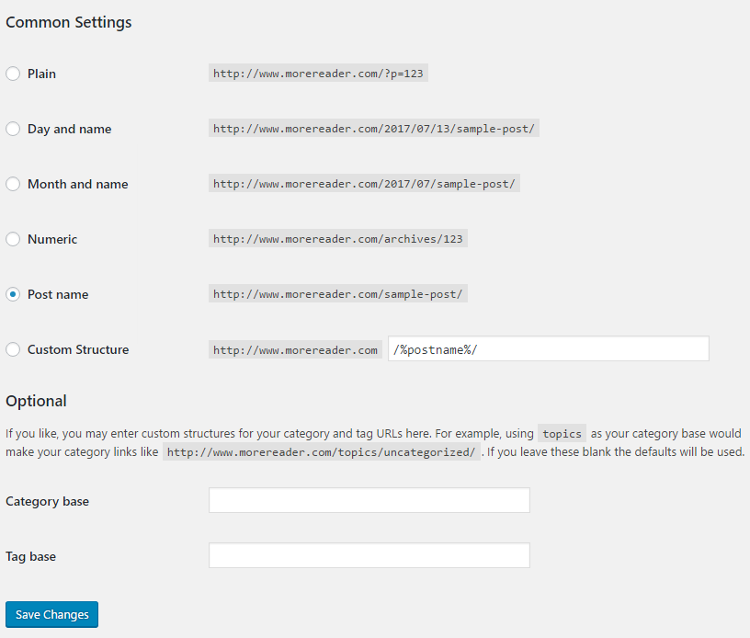
This will fix the 404 error on your WordPress posts and pages.