In this post, I have created a beginner’s step by step guide and a tutorial for TweetDeck. TweetDeck is a real-time tweets streaming Twitter tool where you can monitor live Twitter feeds and tweet streams for multiple Twitter accounts in a single dashboard. In the below given guide I have added steps by which you can add multiple Twitter accounts in TweetDeck, add columns in your TweetDeck dashboard, schedule tweets using TweetDeck, change TweetDeck account settings, enable Bit.ly shortening service, mute text content, user or source and view keyboard shortcuts in TweetDeck.
Also, you can enable or disable live Twitter feeds and tweet streams, enable or disable display of notifications on startup, enable or disable display of media that may contain sensitive content, select a light theme or a dark theme, select size of columns and select font size in TweetDeck.
1) Add multiple Twitter accounts in TweetDeck: You can add multiple Twitter accounts in TweetDeck.To add a Twitter account in TweetDeck, click on Accounts on the bottom left side of the dashboard. Then, click on Add another Twitter account button and add Twitter account.

2) Add columns in your TweetDeck dashboard: You can add Home column, Notification column, Mentions column, Activity column, Favorites column, Lists column, Scheduled column, Search column, Followers column, Messages column, User column, Trending column and Collections column. To add a column in TweetDeck, click on Add column.
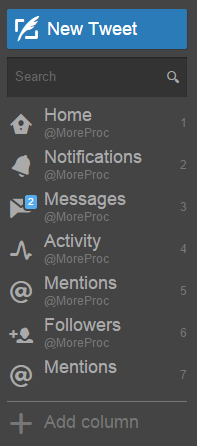
Then, choose column type and add it to your TweetDeck dashboard.

3) Schedule tweets using TweetDeck: To schedule a tweet in TweetDeck, click on New Tweet button. Create your tweet. Links will be automatically shortened by using Ln.is Twitter URL shortener service. You can also add images in your tweets.
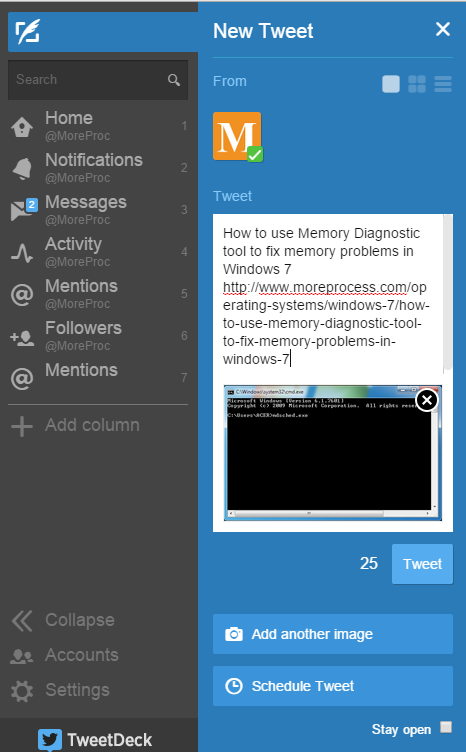
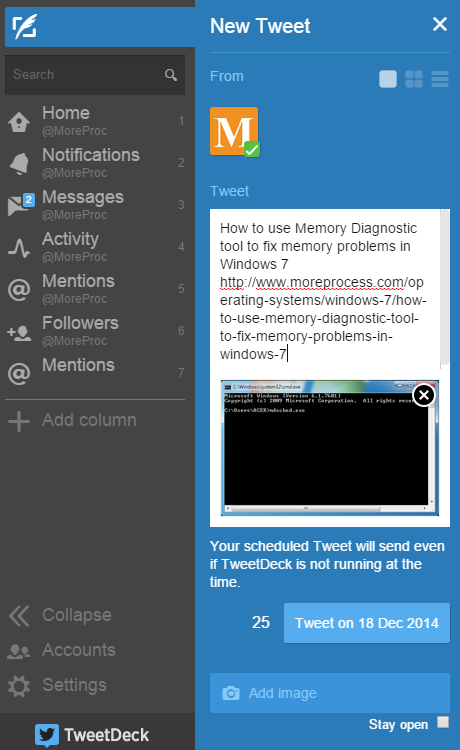
Click on Schedule tweet and select a date and time at which you want to send this message. For Example, here I am selecting the tweet the tweet to be scheduled at 18th December on 9 am.

Then, click on Tweet on 18 Dec 2014 to schedule the tweet. Click on “Stay open” to keep the window open after you send the tweet.
4) Change TweetDeck account settings: To change TweetDeck account settings, click on Settings –> Settings.
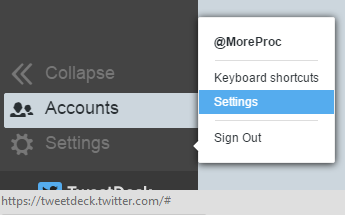
i) General Settings: Go to General tab.
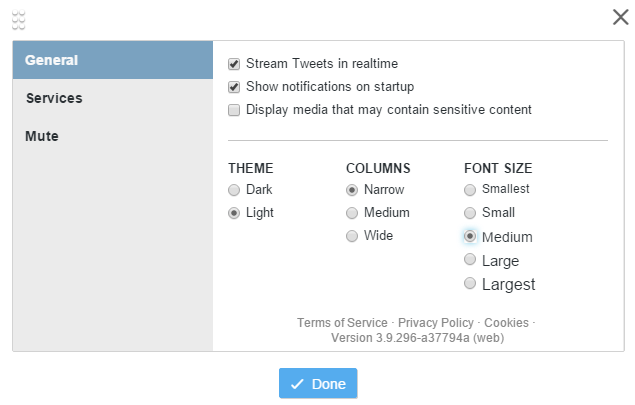
a) Stream Tweets in real-time: Check this option to enable real-time streaming of tweets. You can enable or disable live Twitter feeds in your TweetDeck dashboard.
b) Show notifications on start-up: Check this option to display notifications on startup.
c) Display media that may contain sensitive content: Check this option to enable display of media that may contain sensitive content.
d) Theme: Select a light theme or a dark theme for TweetDeck.
e) Columns: Here, you can select the size of columns in TweetDeck: Narrow, Medium or Wide.
f) Font size: Here, you can select the font size to be used in TweetDeck: Smallest, Small, Medium, Large or Largest.
ii) Enable Bit.ly shortening service: Click on “Services” tab. Here, you can enable the Twitter URL shortener or Bit.ly URL shortener.
iii) Mute text content, user or source in TweetDeck: Here, you can mute text content, user or source in TweetDeck.
Click on Done.
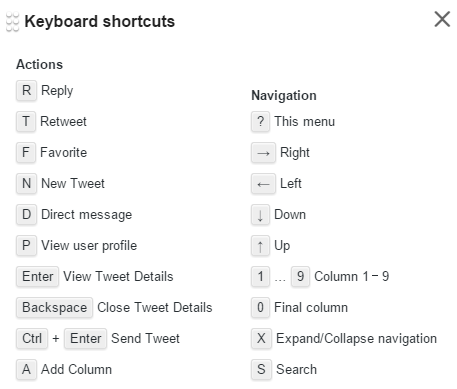
5) Keyboard shortcuts in TweetDeck: You can use keyboard shortcuts in TweetDeck. To view list of keyboard shortcuts, click on Settings –> Keyboard shortcuts.
