Hello, Bonjour, Hallo, Hola, Hej, Ciao! Wouldn’t it be fantastic if you could cater to clients in multiple languages via your website? After all, why should you limit your WordPress site to just a single language?
Creating a multilingual site is essential when it comes to expanding and reaching new target audiences on your eCommerce platform. You also get to offer content, products, and services to your audience in multiple languages. No matter what region you’re trying to build a niche market in, at least one in five people speak a language different from the local dialect. So it makes absolute sense to build a website using multiple languages, right?
That being said, setting your WordPress site to multiple languages isn’t the easiest thing to do, as it is a task usually for seasoned WordPress developers, designers, users, etc. However, following these expert practices and helpful WordPress multilingual plug-ins, you should be able to get the hang of it.
1. Getting Started on Language Switching and Flawless
staring off, you will need to set up a WordPress website if you do not already have one. Once you have that sorted out, you will need to consider the best multilingual plug-ins and other vital factors to look out for when translating your page content.
Since WordPress does not have the in-built capability to create a multilingual website, there are a few premium plug-ins that enable a more straightforward translation process. Some of my top plug-in picks will include; Weglot, WPML, TranslatePress, Polylang, or MultilingualPress. These plug-ins are either free or come with affordable pricing and help you to streamline multi-translation processes on your site with ease. For this article, I’ll be using the WPML plug-in for my examples.
2. Select a Suitable URL Structure
Selecting an independent domain name for your website is always the best if you wish to promote your brand through multiple platforms and search engines. Besides, it also makes it easier for you to decide on how you want to represent the language versions within the URL. For example, if you wish to have a localized version of your site for Spain, you can use either of the following methods:
- www.YourBusinessName.es (Top Level Domain country code)
- es.YourBusinessName.com (Sub-domain for language or region)
- YourBusinessName.com/es/ (Language subdirectory Creation)
The third method is often the most recommended for creating subdirectories for each language because it’s more affordable and easy to manage.

3. WordPress Website Backup
Before you embark on adding more languages to your WordPress site, ensure that your website is suitably backed-up. In the event you encounter a problem, you’ll be grateful that you saved a recent version of your site. There are WordPress backup plug-ins such as UpdraftPlus, Jetpack Security, Duplicator, BackupBuddy, etc. that make backup supper easy.
All you have to do is create a full website backup and keep the download on your computer, save it on an external hard drive, Dropbox, or Google Drive. Once the backup is completed, you can go on to install whatever WordPress multilingual plug-in you downloaded.
4. Translating Your Content
It is important to note that some plug-ins don’t automatically translate your site’s content to other languages for you. And for the Plug-ins that translate automatically, they aren’t usually accurate. Thus you will have to do the content translation yourself, and there are different ways to achieve this:
- Do It Yourself: If you have a good grasp of the language and are comfortable with writing in the dialect, then go for it!
- Google Translate: Remember to do a double-check on this; we all know Google Translate isn’t always accurate.
- Automatic Translation: This comes with specific plug-ins, so you don’t have to leave WordPress to get your content translated, but it also isn’t fool-proof.
- Outsource Translations: For bullet-proof translations, the most reliable method is to send your content to a translator!
Once you have your content translated into the languages you want, it’s easy to add them to your site. Using WPML plug-in as our example, you can add content via your Posts page where there are flags for each of your ‘extra’ languages.
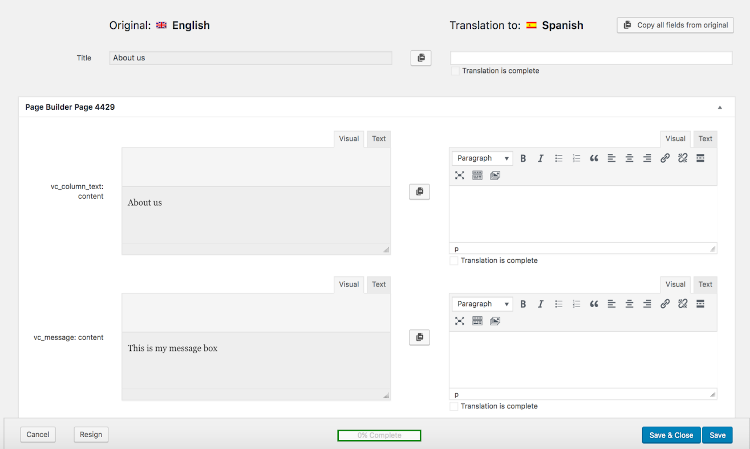
For instance, if your site’s original language is in English and you’ve added Spanish, above your posts, you’ll see a German flag in the header. Underneath the post, there are blue ‘plus’ icons you need to click on. It opens up a page with your English content on one side and split on the right-hand side for you to enter your translated content.
This is what your translation page will look like with WPML’s classic translation page builder:

5. Tweak Each Post to Suit Each Language
Another thing to consider when translating content into other languages is the need to understand your target audiences’ lingo and cultural differences. You need to take into account the use of language, tone, and concepts akin to the dialect and content that will not be harmful to any of their traditions.
Also, it would help if you considered other aspects such as logo design, banners, colors, and symbols that are not viewed as obscene or symbolized as something else that is specific to that culture.
6. Translate all Taxonomies
After you have done all your principal content translations and it looks well put together, you might consider taking a second look. Why? It is because your WordPress website labels may remain in the original language.
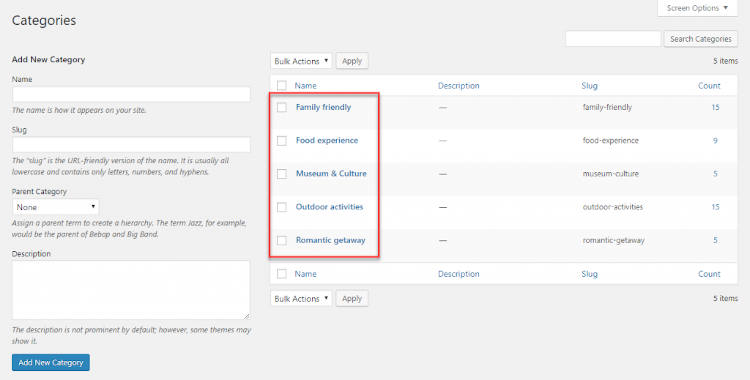
Therefore, you will still need to translate your taxonomies, which include tags and categories. For example, if you have a writing service review website such as Online Writers Rating and categories split into the Term paper, Cheap paper writing service, Write my paper, etc. These labels will remain in English until they are translated.
Therefore, if you wish to deliver an ultimate user experience in a familiar or native language, you need to optimize your web page and do not miss translating a single corner. Besides the tags and categories, your site will also require you to harmonize the overall translation, including; figures or values, product name in URL, mail notification, error or greeting messages, etc.

To achieve this on WPML plug-in for WordPress, go to the tab in your WordPress dashboard and navigate to ‘Taxonomy Translation’ on the menu. From the list, you can select the taxonomies you would like to translate. Then click on the “blue plus button” to add your translations. The same will also apply when translating your themes, menus, and plug-ins.
7. Adding a Language Switcher
Once you’ve selected a new language(s), you’ll also need to add a language switcher. With a language switcher, your visitors can move between the different languages on your site with ease. This function comes as a row of flags, or a dropdown list of languages.
Also, you can set the display as the name of the language being used to view the page. For example, if your site is viewed in Spanish, and the user wants to switch to English, the language name would appear as “Ingles.”
So if you have selected The WPML plug-in as your WordPress multilingual plug-in, it will prompt you to add a language switcher like this:

8. Provide Customer Support in all Listed Languages
An effective Customer support system solidifies customer satisfaction and loyalty to a brand. Thus, if you incorporate the same for all the listed languages on your website, it works like a charm.
Proving support for customers in all the available languages on your site encourages users to interact with your team through informal live chat and calls.
Although this might be a bit of a stretch on a budget of smaller businesses, they can start a support department only on the major languages and then expand to more languages as the business also grows.
Conclusion
Using the right WordPress multilingual plug-in to set up a multilingual WordPress site should be less intimidating. And coupled with the tips in this article, it’s time for you to get to work on your website!